Silence

It’s been silent for a few weeks around here. Everything is fine and everyone is well, thankfully. Somehow even with social distancing and quarantine and all we have been so busy with school and work and projects that time has simply raced by. Before my unintentional break, I’d been working on multiple posts that I had hoped to get out a while ago (including a sour dough starter tutorial for a friend), but I’d run into issues with the photo editing program I was using and had to upgrade. If you look at the photos from my last post compared to the others…you’ll see what I’m talking about.

After that we just got so busy trying to catch up on other things and adjusting to the current normal. While much of our school and work routine hasn’t changed, our grocery shopping, errands and meals etc have had to be adjusted. It’s certainly a minor inconvenience compared to many peoples circumstances and by no means do I want to come across as complaining. It has however, changed some things significantly and we’re trying our best to figure out the best way to do things affordably with the best possible nutrition etc. It’s simply been a season of adjustment and it’s left us feeling a little…

evi

This may get long, so brace yourselves. I’ll start with an update on what’s been going on around here and then I’ll end with some things I’m hoping to do here with the blog and such. 🙂

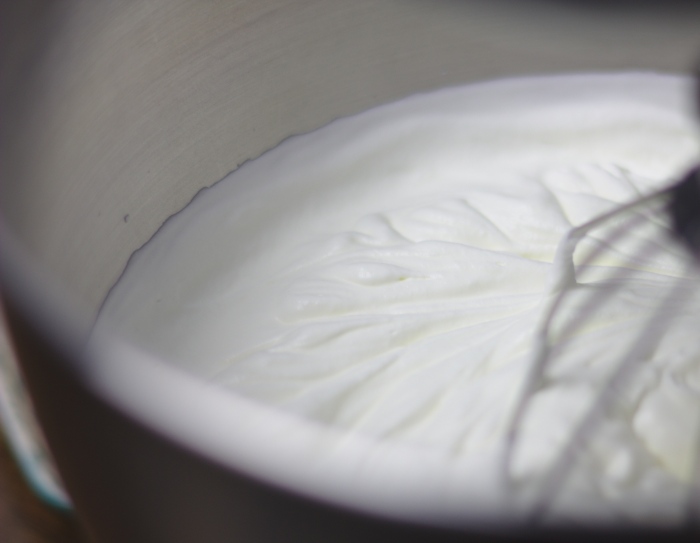
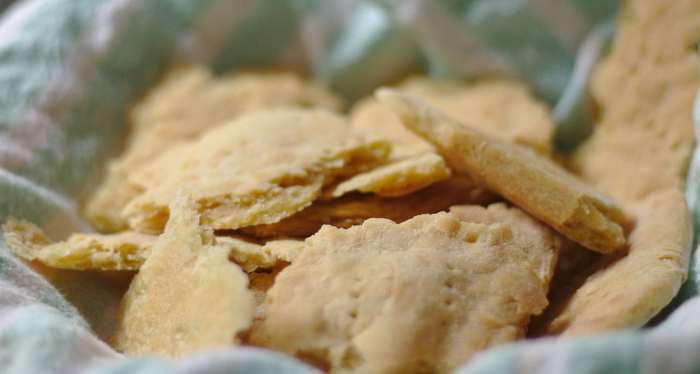
First, I killed my trusty sour dough starter(insert sad face and tears)!! This was such a good starter and made us so much bread and pizza… and I could have cried! Technically I didn’t kill it, I’m pretty positive it was the cheap/bleached flour (all that was left at the store). It was doing wonderful until I started using that flour and then within days of using it my starter was dead. I tried to revive it but it was too far gone. Rest in peace “Sour Sam”, you’ve been good to us.

sour dough

Second, I’d wanted to purchase a grain mill for years and just hadn’t…mostly due to the investment, but given the flour shortage, thanks to Covid, I took the leap and ordered one. FINALLY. Naturally EVERYTHING is currently on backorder (I was a little late on acting on my instinct to purchase one and I’m on my second attempt to order one that’ll arrive before 2021).

After research and much debate, we decided to go with this guy. It was either this or the Wondermill but that one was simply too big and bulky for our small kitchen. I’m pretty excited to try out our Nutrimill Harvest.

NutriMill Harvest Grain Mill with Gold Trim

On that note, once this guy gets here, I’ll be starting a new sourdough starter with homeground flour. I’ll keep you posted on all of that.

I’m still planning to create a “How to create your own starter” post and I may even retake all of the photos since I want to wait until I can grind my own grains. I’m curious to see the difference in the starter with the fresh ground flour.

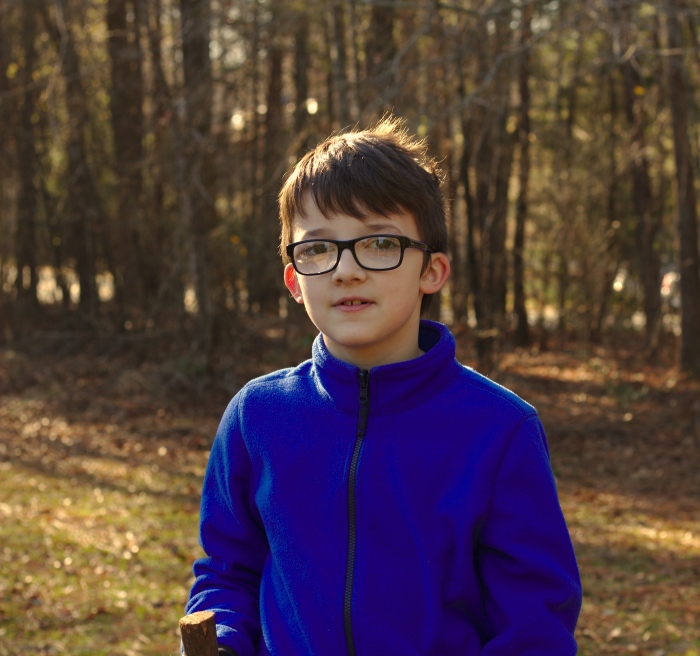
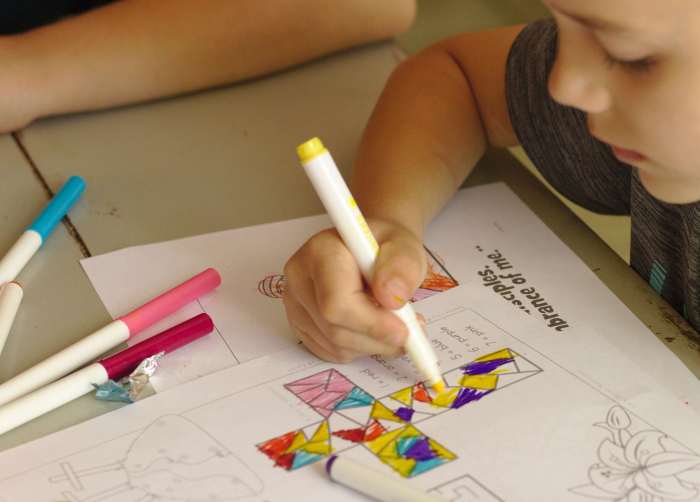
In other news, school is going well mostly. We’re trying to wrap up the school year as far as core subjects go. We started year round schooling with a month long break in June as of this past year so we’re going to be starting the next grade come July. My oldest will be taking his first standardized test in the next couple of weeks (as per Georgia law). We have received it and we’re both a little anxious about it but after having looked it over, I think he’s going to be just fine. There’s that part of me that has to fight off the thoughts of “what if I didn’t do enough for him to prepare for this…what if I’m not a good enough teacher…” but the reality is the test is there to let us know where we stand and it can be a very useful tool in helping me know where he’s excelling and where he needs more work.

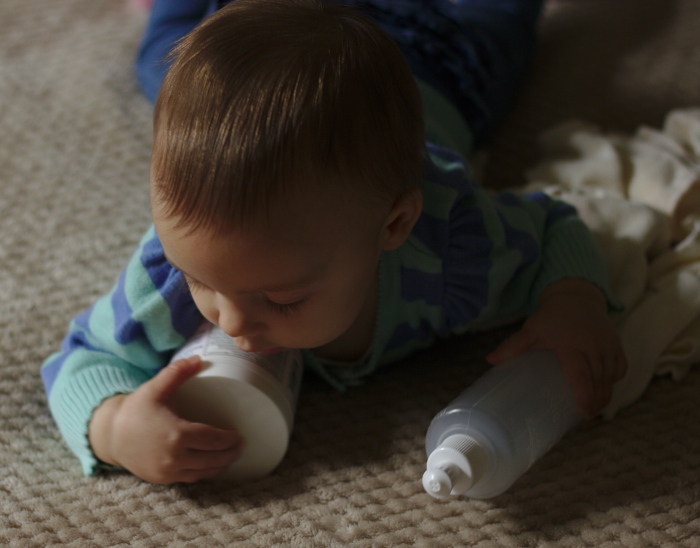
Just look at them…lol. Ask me how many times per week I’ve been cleaning their bathroom, go ahead. It may or may not have been part of the reason for the silence.

dirty

bike

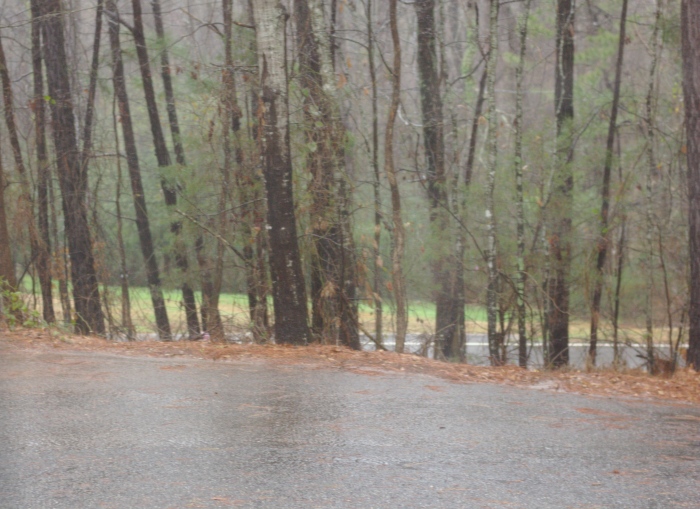
We’ve been spending a lot of time outside, as you can probably tell. This is the time of year that makes us just want to play in the garden all day. Warm sun, cool breeze…ahh.

Speaking of garden, we’ve planted one, a relatively small one this year. We’d had a lot of issues with our last one so we wanted to be a little cautious this year and see what we can do. We’re going to have (hopefully), cucumbers, tomatoes, kale, broccolli, cauliflower, radishes, herbs and some flowers for cutting. I’m also trying to get some lettuce and celery going. I’ll keep you posted on how all of that progresses.

Here’s some of the herbs that I started inside. I really love baby plants. ❤

babies

I told you it’s been busy around here. I never realized how busy quarantine could be! Of course I also never really thought any of us would have experienced quarantine, period.

Coming up next, is a collection of resources and activities that I’ve come across while working on some research for our church’s Cubbies class. In case it interests any of you who may be homeschooling or just looking for activities to do with your little ones this summer I thought it may be a fun post to share since summer is quickly approaching.

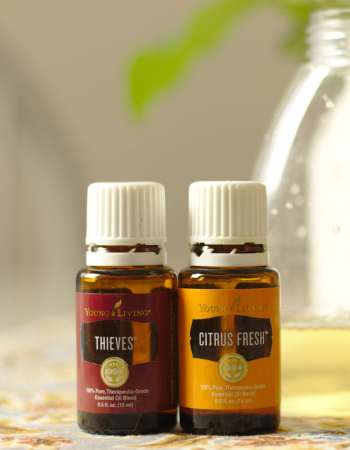
Until soon friends. Stay safe and healthy! Also, if you’re at all interested in Young Living Essential Oils, feel free to visit my new Instagram page dedicated to YLEO! Look for it at @wholelivingwithoils! 🙂

Of course also remember to check out my regular Instagram @oursimplefamilyliving!

Much love,

Nadine

Holy Week & Easter- Quarantine Style

castile_MG_9812

Easter is one of my most favorite holidays. I love all of the sweet and cute Spring inspired decorations including the bunnies and birds and all…but I really love the true story of Easter. The resurrection. The gift given to myself and all of mankind. We wanted to make sure to include lots of time preparing our hearts for Easter while enjoying all the fun it brings with it. Here’s a sneak peek into our quarantined Easter week.

castile_MG_9854

castile_MG_9858

We spent the week leading up to the weekend doing school lessons that pertained to the Easter story. Perhaps some of these may inspire you for next year. The best part…they’re either free or super inexpensive!

castile_MG_9737

Two of my three boys are at an age where I can really discuss with them the true meaning behind what we celebrate. We’ve had some great conversations over the last several years and it’s incredible how much they understand at such a young age. Of course I still have to keep the lessons short due to attention spans but the information can be rich even if it is brief.

  1. We started out the Holy Week lessons with discussion on what Lent and Holy Week are. I did some research and put together some notes for myself that the kids would be able to understand. I included a brief rundown on what topics we’d cover over the course of the week such as:
  • Palm Sunday
  • The Last Supper
  • Good Friday
  • The Resurrection

2. I created a Spelling list using words that would pertain to the Easter story and used those to create a crossword puzzle and a word search. You can do this for free with some online resources.

castile_MG_9759

Check out www.education.com for a free word search generator.

Check out https://worksheets.theteacherscorner.net/make-your-own/crossword/ to create your own crossword puzzle. 

Or this cross maze…

Click to access EasterCrossMaze.pdf


castile_MG_9753

castile_MG_9780

3. For Math we spent the week reviewing. My third grader has a big test coming up next month so I wanted to use this opportunity to review problems he needed extra help with.

4. Read a louds consisted primarily of the Easter story…Bernstein Bears Easter Parade and one of the novels we’re currently reading.

castile_MG_9712

5. We watched the Superbook Easter Story as well. All three boys loved this one. It’s completely free!

6. We had lots of fun coloring free coloring pages each day…check out some of these by Oriental Trading:

https://www.orientaltrading.com/craft-and-hobby-supplies/coloring/free-printable-coloring-pages/easter-a1-554625+1232-1.fltr

castile_MG_9723

castile_MG_9731

7. We did a few fun activities like crafts and building lego tombs. The lego building was of course a huge hit with the boys since they got to play with legos for school.

castile_MG_9578

castile_MG_9662

castile_MG_9785

castile_MG_9797

8. We colored our Easter eggs… this year we tried some all natural food coloring for the first time. This is one of those things we’ve wanted to try for many years and until this year I always forgot to get it in time and would end up having to buy the chemical stuff from the store. Next year I’d love to use food to color the eggs!

egg

9. We spent lots of time outside enjoying that fesh spring air that Easter brings!

castile_MG_9546

castile_MG_9539

castile_MG_9534

castile_MG_9483

10. On good Friday the boys went camping with their Daddy. I didn’t manage to get any pictures unfortunately but they had so much fun. They’d been wanting to camp for quite a while now but the weather hadn’t cooperated so we took the opportunity we had and made it happen. While it wasn’t a very traditional addition to Good Friday it helped make it a memorable one.

10. Saturday afternoon we  had our second annual Resurrection Easter Egg Scavenger Hunt! I looked forward to this all year. So did the kids!

11. Easter Sunday we enjoyed family time, watched the service online and had a fancy dinner as well as communion. We made some diy unleavened bread had some red fruit juice & read scripture together. This was something new for us this year. We decided to do this because of the quarantine but we enjoyed it and I’m thinking we’ll do it again next year!

bread

I finally used that little bunny cake pan I was given from a family friend. I’ve been on the hunt for a lamb mold but haven’t found one I like enough so if you happen to know of some good options let me know! 🙂

bunny

That sums up our I hope you’ve found some inspiration here for next year! Happy Easter from The Dillard Family!

eASTER3

When I see these little people lined up in a photo, it still amazes me that they’re all mine.

Praise GOD! ❤


Easy DIY Handsoap With Essential Oils

soap2
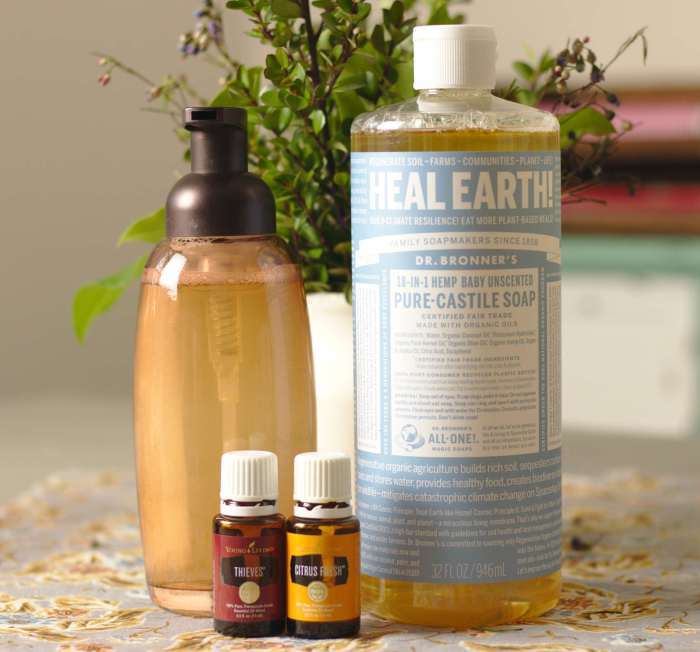
Let’s talk about handsoap. It plays a very important part in keeping our family healthy. Particularly in light of all that’s currently going on in the world with this Coronavirus. I’ve seen friends posting on facebook and instagram about stores running out of handsoap and having to go to multiple stores to find some over the last few weeks so I wanted to share this quick and easy DIY handsoap tutorial because handsoap is not something we can go without, especially during times like this.

Around our home, with 4 little children and 2 adults, we go through A LOT of handsoap. Depending on the kind of soap you’re buying, that can get a little pricey. We generally opt for all natural products in our home and that means we often have to pay a little bit more for certain products. Handsoap is one of those items.

The good news is that buying the ingredients to make a natural & effective handsoap here at home works out to be much less expensive. I also typically always have the ingredients around the house as long as I keep myself well stocked so I don’t ever have to worry about running out of soap and having to run to multiple stores to find handsoap.

So, let’s get started on making some natural & effective handsoap!

Here’s what you’ll need:

Soap dispenser bottles

A couple of years ago I switched to these foaming handsoap bottles because it seems like the kids don’t waste quite as much of it this way.

I have both glass and plastic bottles currently. I prefer glass but I also use the plastic ones for the bath soap I make for my kids. I purchased these from Amazon and so far they’ve worked quite well.

Pure Liquid Castile Soap

I’ve used Dr. Bronners Baby Unscented for many years. I usually purchase the big bottle because I use it for handsoap, bath soap and dish soap as well.

Essential Oils

You could leave this ingredient out if you don’t have any but honestly, I think it’s 100% worth it to invest in at least a few quality essential oils for your home.

I’ve tried many different brands over the years. For the last few years, I’ve used Young Living oils because I trust their quality. I don’t buy separate oils for my household products and personal products so it’s important that our oils are safe for us to use on our bodies as well as internally, not just for our cleaning products. I can trust Young Living to be safe and effective for our family so after researching them myself, that’s my number one choice. 

I use Essential oils in my handsoap to help kill bacteria and viruses (they smell so good too). Thieves oil and Citrus blend works extremely well for handsoap, dishsoap and cleaning products. You can look into that some more here:

https://www.youngliving.com/en_US/products/thieves-essential-oil-blend

https://www.youngliving.com/en_US/products/citrus-fresh-essential-oil-blend

*Be sure to do your own research on oils. If you’re interested, you can check out Young Living’s seed to seal quality commitment and its three pillars- sourcing, science and standards right on their website! They’ve been doing this for 25 years and have made it their mission to be the best available on the market. You can also ask me as well! 

The only other ingredient you’ll need is water. 

So, now that you know what you’ll need, let’s get started. This is literally so easy to make that you’ll have handsoap for all the bathrooms in minutes!

Step one: 

Fill the bottle about 1/4 of the way with castile soap. It doesn’t have to be exactly 1/4 but try to get it to about 1 part soap 3 parts water.

castile

Step 2:

Add about 7 drops of Thieves oil and 3-5 drops of Citrus oil.

soap1

Step 3: 

Fill the rest of the dispenser with water. Just make sure you leave some space at the top to add in the pump.

soap4

That’s it! It’s so easy and believe me, it works! It smells pleasant and saves you money! Give this soap a try…you won’t regret it!

Hang in there guys! Hopefully this Covid19 nightmare will be over soon! Make sure you stay home as much as possible and wash those hands!

DIY Laundry Soap

It’s been a chaotic and uncertain time for many of us these past couple of weeks so this space has been quiet a bit longer than I’d intended. Fortunately we are all well in my home and I pray those of you reading are healthy too!

As promised, I wanted to share a simple tutorial on making inexpensive (and easy) laundry soap. The more things you can make from home (using simple ingredients that we typically keep at home in bulk anyway) the less trips to the store you have to make. At the moment that’s a wonderful thing!

Even when life returns to normal, skills like making your own laundry soap help make life a little slower and more simple. If you’re like us and living on a small budget, DIY laundry soap along with other simple laundry ingredients and accessories, will save you quite a bit of money. 

laundry soap4

Here’s some info on the basic items that I buy regularly and try to keep on hand at all times:

A large jar like this one is what I use to store my powder laundry soap. You can find these at Walmart for roughly $9. I believe this one is their Anchor Hocking line. I can’t remember where I got the scooper from but I am pretty sure I didn’t buy it. It came from some other packaged item.

laundry soap

Next, you’ll need washing soda, borax, baking soda and Fels Naptha bar soap. I usually buy the large box or bag of baking soda but during my last grocery run they didn’t have any so I had to settle for the little boxes. I usually keep multiple boxes and bars at the house so I have extra and can make it without having to run to the store for ingredients. With 4 kids I have a lot of laundry and make a lot of this stuff!

I also bought a grater from the dollar store that stays with my laundry supplies specifically for making laundry soap.

The washing soda is approximately $4 per box. The baking soda is $4 for a 5lb bag. The borax is $4.50 and the Fels Naptha bar is less than $1.

cd2

In addition to the ingredients listed above, I have purchased the dryer balls in place of dryer sheets. Mine are old and need to be replaced so I’ve been looking around on Amazon for a replacement. These are what I’m going to be ordering soon:

SnugPad Wool Dryer Balls XL Size 6 Pack, Natural Fabric Softener 100% Organic Premium New Zealand Wool, Chemical Free and Reduces Wrinkles, 1000+ Loads

They go for about $9 on Amazon.

cd1

Lastly, I use white vinegar in place of fabric softner as needed. Walmart has it for less than $3 for one gallon. I store some in a small glass jar with a lid to make it easier to use.

Ok, so now you know approximately what it’ll cost to get you started and what ingredients you’ll need. Now lets talk about what to do to put it all together. It’s going to take you about 10 minutes at most to make it. It really is that simple.

You’re going to fill about 1/4 of the jar for each of the powders (baking soda, borax and washing soda). Leave about 1/4 of the jar for the bar soap.

laundry soap2

Next, you need to shred the soap into fine shavings and add it in. Then mix it all together with a spoon.

laundry soap3

Now you have about a gallon of laundry soap. Depending on how much laundry you do, this will last you quite a while. I think for us it usually lasts about 2 weeks. I typically will use about a scoop to 1 1/2 scoops depending on the size of the load. The soap works very well to remove odor and stains. In fact, for stubborn stains, keep a whole bar of Fels Naptha on hand and soak the item in cold water and rub with the bar soap. Be sure to always use cold water with stains.

Side note: if you want the laundry to have a stronger scent when you pull it out of the dryer, you can add some drops of your favorite essential oils to the dryer balls. I really enjoy using Young Livings Lavender or Geranium oils for my laundry.

Another laundry tip: if you have problems with mildew odors in towels, use hot water to wash them and add a few drops of Melaluca oil. It’s an antifungal and significantly decreases that problem.

You can use this laundry soap on all of your laundry, delicates, towels, baby clothes and cloth diapers!

You can check out my post on what cloth diapers we use here:

https://oursimplefamilyliving.wordpress.com/2020/02/26/cloth-diapering-essentials-favorites/

You can also check out how I care for our cloth diapers here:

https://oursimplefamilyliving.wordpress.com/2020/03/08/caring-for-cloth-diapers/

I hope you find this information helpful and that it inspires you to live more simply.

Feel free to share any great laundry tips and tricks in the comments! 🙂

Stay healthy friends!

Caring for Cloth Diapers

So you’ve picked out the perfect cloth diapers and accessories, you’ve placed the order and now you have to figure out how to take care of them once they arrive. Rest assured, it’s really much easier than most think. There’s a plethora of information out there on caring for cloth diapers but honestly it’s largely a matter of preferance.

Getting Started:

The first thing you’ll want to do is make sure you check the manufacturer’s instructions and warranty info.

Generally you’re going to have to wash your diapers multiple times prior to using. This helps the diapers absorb better. I usually wash them about three times before the first use.

You’ll want to be careful with laundry soap. Choose one that does not contain a lot of fragrance, enzymes, softeners, etc. I make my own using a few simple ingredients. I’ll share the recipe for my laundry detergent with you in the next post so stay tuned if you’re interested. It’s easy, inesxpensive & works very well.

You can use plain white vinegar along with the detergent to help soften and deoderize if needed once you start using them.

Drying your cloth diapers is going to depend on your preference/manufacturer. I’ve seen lots of different opinions on drying the diaper shell in the dryer, but generally drying the insert seems to be fine. During the warmer months I dry the shell on a drying rack outside in the sun. When it’s cold out, I prefer to dry them in the dryer because it just takes too long to air dry.

Regular Washing:

Once you start using the diapers, you’ll want to make sure to wash them about every three days. So roughly twice a week.

I store the dirty diapers in a garbage can with a wet bag in it.

cd5

Since my daughter’s still breastfeeding a lot, her poop isn’t solid enough yet to use the diaper sprayer, but once it gets to that point I’ll be spraying the poop into the toilet prior to placing the diaper in the can/wet bag. For now all I do is open the diapers and take apart the shell/insert & take out any cloth wipes. I place everything in the washer together, along with the wet bag.

Next, I run the rinse & spin cycle on my washer with cold water.

After that, I change the soil setting to “extra heavy” and use hot water and detergent/vinegar.

cd1

At this point I will either hang them to dry or place them in the dryer with my wool dryer balls. I usually have to dry them for two cycles to get them completely dry.

Once they’re dry, I sort through everything and get them ready to use.

cd4

cd3

cd12

That’s it! Super easy and takes only a little extra effort and time.

In addition to regular washing, I usually “strip” my cloth diapers about every six months or so depending on how they smell/perform. Over time oils and dirt build up causing the diapers to hold onto odors and leak. I will say, I’ve had very few issues with this brand and even after nearly 10 months I still haven’t had to go through the process yet! If you’d like more info on what kind of diapers we’re using and loving, check out my previous post here:

https://oursimplefamilyliving.wordpress.com/2020/02/26/cloth-diapering-essentials-favorites/

Stay tuned for a post on my DIY detergent next! I’ll also be sharing a post on stripping your cloth diapers to freshen them up every so often.

I hope you found this post encouraging and helpful if you’re new to cloth! There’s a lot to love about cloth diapers! If you have used cloth and you have some great tips, please share them in the comments! 🙂

Cloth Diapering Essentials & Favorites

Have you ever thought about cloth diapering but weren’t sure you could handle the extra work involved? Did you think it would be to expensive to get started? Thought there was too much to learn? It seems so complicated…I’ve been there too. When I was pregnant with my first son almost a decade ago now, I was doing a lot of research on natural living and one of the things I’d wanted to try so badly was cloth diapers. Unfortunately it took a while after he was born for me to finally work up the nerve to try it out. Even since then, there have been seasons where we only cloth diapered part time or not at all for a time (with my second son I worked full time and was in grad school), but we never fully gave it up with either of our four children and overall we have grown to love it. With baby number 4, we’ve almost exclusively used cloth since she was big enough. I say almost exclusively because we do drop her off at the nursery at church where they’re typically not familiar with cloth diapers so we use disposables there. We also have periods where baby just gets too wet at night for the cloth diaper so it’s just easier to use a disposable at night. You could certainly just change baby half way through but for now this as been working best for me. Once they don’t nurse as often through the night and no longer get so wet, we go back to cloth diapering through the night. So now that you know some of the back story, let’s talk about what we use and how we use it.

First of all, I’m pretty simple when it comes to most things. Cloth diapering is no exception. I only use what I truly need and try to get it for a good price.

What you really need:

cd1

  • Approximately 15-20 cloth diapers (and a basket to store them in)
  • bottle for water
  • cloth wipes
  • wet bag for dirty diapers (as well as a trash can to store it in)
  • cloth diaper friendly ointment
  • diaper sprayer

I bought a couple of smaller wet bags for when we cloth diaper on the go this time but honestly I don’t need them that often. They are nice to have but I wouldn’t consider them a necessity. You could always use a grocery bag for wet diapers if you wanted to save that money.

The Diapers:

Between the four kiddos I have used a wide variety of diapers, prefolds, pocket, all in one. The prefolds worked wonderful but I didn’t like how bulky they were. I used those with my third son and wanted to switch with my daughter. I didn’t have any of the diapers left from my first two so I ended up buying all new diapers. I am able to use the inserts from the new diapers with the shell from the old ones which is nice but I have enough shells for her to where I’ve contemplated selling or donating all of those with the prefolds.

I’ve used some of the pricey diapers and frankly don’t think they were worth the extra expense.

With Everleigh I settled on these Alva baby diapers and we have loved them! They are adorable, easy to use and care for and well made! Here’s the best part, they’re super affordable!

I purchased mine from Amazon for about $30. They came in a set of 6 covers and 12 inserts.

cd9

cd19

cd14

cd10

Wipes:

I use mostly reusable cloth wipes. It just made the most sense with cloth diapers because I just keep it all together in the pail and then throw everything in the washer. The wipes I bought from Amazon are nice and thick, soft and easy to care for.

cd3

These are by Babygoal (bamboo) $8.99 for 12! I think I purchased 2 sets for a total of 24 which is more than enough for us. Compared to the price of disposable wipes and it’s no extra laundry since I’m already washing the diapers.

The bottle I use was free, it came home with me from the hospital. I’ve used baby castile soap mixed with water but most of the time it’s just water.

The Wet bags:

This is the wet bag that I purchased, also from Amazon. It’s by Alvababy, like the diapers. This one is their large bag. It has great reviews and has held up very well. I wash mine every time I was a load of diapers. It’s inexpensive at $14.99

Then I also have the small ones (from Amazon). They came in a two pack for $9.99!

The Diaper cream:

cd4

I’ve used a few different ones over the years but I always come back to this one. It’s by Grandma El’s and comes in a 3.75 oz tub for $12.99 from Amazon. It typically lasts me about 6 months even when I use it almost daily (all of my kids have had sensitive skin).

The Sprayer:

I purchased this one by Easy Giggles from Amazon for $29.99. I haven’t had to use it much yet but I know those days are coming and it’s so much easier having a sprayer (I’ve done without one at times and wanted to make sure I had one this time). It has over 1,200 reviews and almost 5 stars so I think we’ll be happy with this one. The price is great and from what we can tell it looks well made. It’s installed and ready to go for when we need it.

That’s it! Store them in a pretty basket, ready to use just like disposables.

cd12

If you add everything up, that comes to less than $200. I’ve been using the same diapers and wipes for almost a year now and I’m on my second jar of ointment. That’s a price I feel good about. It honestly pains me to buy the disposable diapers when I think about how quickly they’re gone yet how expensive they are.

I hope you feel inspired to make the switch! You won’t regret it!

Next up, I’ll share with you what I do to care for my cloth diapers.

cd11

Saving Money on Groceries

gh6

Groceries. They are vital in all of our homes and use up a significant portion of our income. With a family of six, we have to be very intentional about how we plan meals, purchase and prepare food.

Let’s talk about five simple ways we save money on groceries:

Consistency

This is probably the hardest for me. At least in this current season of life. There is always something that seems to come up that stops me from being able to get my menu plan done or go through the pantry, fridge and freezer, make the trip to the store etc. The problem is when I don’t consistently go on the same day, we end up running out to the store for “just a few things to get by” and spend much more than we would have.

Typically for us it’s best for me to go either Friday on payday or the Saturday after since by the end of week two we’ve used up pretty near everything we have. Haha!

Bi-weekly or monthly shopping 

As I mentioned earlier, bi-weekly or monthly grocery shopping can drastically cut your grocery costs while feeding your family good, whole, from scratch foods. It’s also a lovely perk that it helps keep you out of the store. I know not everyone may feel the same, but I’m not much of a shopper. I just don’t enjoy it, so if I can suffer through a larger shopping trip and have to do it less often…I’ll do it! When the time comes and space allows for it, you’ll likely find me jumping on the “once a month grocery shopping” bandwagon!

g1

Shop the right stores

This ones a big one for me! So many times I’ve found myself in the wrong store thinking I can make the shopping trip easier by shopping for everything in one store without over-spending, but I end up paying far more than if I’d just made a couple of extra stops. For our area, I hands down recommend Aldi for the bulk of groceries.  It’s always worth the trip. Even when I don’t really feel like driving the extra distance.

g5

Some things I can’t find at Aldi and usually purchase at Walmart or Kroger. For most everything else like cleaning supplies and toiletries/household items I usually use Walmart and purchase the least expensive version without compromising quality.

Cooking from scratch

This one is something that so many write off immediately because they’re “just not much of a cook” or they “don’t have time for that”, but you’d be surprised at how easy and fast some of these “from scratch” items actually are.

If you’re new to cooking from scratch, I’d suggest starting with one or two new things at a time and working at getting good at it. For example, say you’re used to buying store bought pizza or ordering pizza, start by trying out different pizza dough recipes and find one that your family prefers and work out the kinks. Over several weeks of making it repeatedly, you’re going to get faster. You’ll save quite a bit of money and eat food that’s made with real ingredients that you yourself selected. No extra preservatives. Just real food. Once you master something like pizza dough, move on to bread. Similar ingredients and process so it’ll be a relatively easy new product to learn. Start small and build on it to avoid burn out and don’t get frustrated. I’ve been baking for many years and still mess up more than I’d like. Just the other day I was prepping breakfasts for the week and managed to forget to add yeast to the dough since I knew I wasn’t going to have time to let the sourdough rise the dough and ended up with hockey pucks instead of bread. It happens.

Preparing food ahead of time

Oh this always makes for a day of hard work but it’s always so worth it in the end. My week goes so much smoother when I make the time to prep meals ahead of time. We don’t find ourselves in a pinch running to the store to grab something quick or eating out. Planning out and cooking/baking in large quantities also helps save money in most cases since purchasing ingredients is most of the time less expensive than purchasing the smaller quantities.

Get yourself a simple meal plan going and plan out everything from breakfast and snacks to lunch and dinner.

Check out this free printable planner page:

https://niftymom.com/2016/01/printable-weekly-meal-plan/

Prep what you can ahead of time and then eat it through the week. For example, one of my favorite things to prep ahead of time is breakfast. It’s always a stressful meal to make and clean up with homeschool, baby and chores so simple and fast is key! One of the things I like having on hand are items like from scratch english muffins and bagels, regular breakfast muffins, pancakes, frittata, etc. All of these keep well either in the freezer or the fridge and are simple to make.

Another little food prep tip…come up with weekly themes, like Taco Tuesday or Friday Pizza night, this will not only make meal planning easier but will also ensure you’ll always have ingredients on hand for a meal if you do end up in a pinch. We usually have homemade pizzas every friday night so at any given time I will have what I need to throw together a pizza if I needed to. Speaking of prepping ahead, did you know you can make multiple dough balls for homemade pizza, throw them in the freezer and thaw them as needed?!

25

Mix up a few fancier meals each week with simpler/less expensive ones

This is probably one of my best tricks to keeping the kids and hubby happy with meals on a small budget. I love meals like Spaghetti and black beans and rice but a good portion of the rest of the crew isn’t quite as thrilled with it so it helps for me to sprinkle in the “good stuff” in between the not so favorite items.

You can make a couple of vegetarian meals in between heartier meals with meat to please the family too. Most of our family enjoys a good big salad so every so often we’ll just make a big salad and either substitute boiled eggs for the meat or leave it out entirely. You could also make some chicken to go on the salad if you’re just not into meatless meals. It’s a quick meal with ingredients we typically always have on hand and it’s healthy!

What are some of your best tips for saving money on groceries?!

g2


The Most Important Work

I fell behind this week. On pretty much everything. Some weeks are just like that. Try as I may, nothing seems to get done. It was hard. I don’t like chaos and disorder and frankly, with a large-ish family, you really do have to stay on top of everything 24/7. One day missed can lead to an oversized snowball of craziness. Even so, I find myself sitting back more and more and just taking them in. The sweet little voices, the silly little quirks, muddy pants (and faces). I know it’s going to be over in the blink of an eye. Home needs to be an organized, peaceful and cozy place of refuge for our families, which requires much wok from us. but it also must be a place where our children feel loved, respected and safe. It’s so easy to let all of the “important” work consume us, but we musn’t forget about the most important work the LORD has given us. To all the mamma’s out there struggling to get it all done, I wish you the best week full of the most important work!!!

4c7141065a5e13fdc18d028809b86576

misc5

misc2_01

misc

misc4

Homemade Butter & Buttermilk

I’ve been baking bread for a long time. The store bought stuff just doesn’t compare. It’s worth the extra time and work every time! So what do you do with a fresh loaf of homemade bread?! You pair it up with some fresh homemade butter, of course! It sounds crazy…making your own butter, I know. A couple of years ago I was a little nervous to try it. If you have a mixer, it’s basically making overwhipped whipped cream! Within a few minutes you can turn a 32 oz bottle of heavy cream into about two sticks of butter. Just make sure to stay by the mixer because it goes pretty quickly and if the mixer is turned up too high it’ll make a terrible mess. I recently stepped away for a “second” to change a diaper and returned to buttermilk splashed all over the mixer, the counter, the floor. It wasn’t pretty.

Here’s what you need:

32 oz bottle of heavy cream

bottle or jar to store the buttermilk in (I reused a bottle from juice)

mixer with whisk attachment

butter dish and parchment to store the finished butter in (I put one in the dish and store the other in parchment in the fridge)

butter 1

Step One: pour the whole bottle of cream into the mixer and set to about medium speed.

butter 2

You can see the bubbles starting to form.

butter 3

Getting close to “soft peak” whipped cream.

butter 4

butter 5

Step two: Here we’re at about overwhipped whipped cream stage. At this point I would turn the mixer down just a little.

butter 6

butter 8

It’s getting thicker now. Not much longer before it starts to separate.

butter 9

butter 10

Step three: it’s separating now and most of the solids will stick to the whisk attachment.

butter 12

Check out that buttermilk! It’s great for biscuits, pancakes, homemade ranch and more!!!

butter 13

Step four: take the butter out of the mixing bowl and work out the rest of the buttermilk using either your hands or a wooden spoon/spatula.

butter 15

Step five: shape the butter the way you like it. Sometimes I leave it like this but most of the time I separate this into two sticks of butter.

butter 16

Step six: pour buttermilk into your jar or bottle. I generally prefer glass over plastic.

butter 17

There you go! Six easy steps to fresh butter and buttermilk!

butter 18

Now make yourself some English muffins and enjoy! 🙂

english muffin

Day in the Life of a Homeschool Mom & Homemaker

Today we’re going to do just a fun sneak peek into an ordinary day. Josh was away on a business trip this particular Friday so things were slightly off from our usual routine but overall this is what most Fridays look like around our home. We do have school Fridays, but it’s our “catch up day”. Monday through Thursday is when we schedule the bulk of the schoolwork and then Friday we can take a more relaxed approach to school, work on housework that needs to be done, grocery shop, appointments, if the weather is nice, we can go outside and play in the afternoon, etc.

I pretty much took photos all throughout the day and the lighting was terrible so the photos aren’t the best quality. They do the job of telling the story though so we’ll just have to look past that.

This particular morning I ended up getting a bit of a late start, the kids and I didn’t really get “moving” until about 8:30. First thing I always do once I get up is get coffee going (that’s very important). That’s the cardinal cup Jaden got me for Christmas. He knows I love my birds and my coffee! Sweet boy!

coffee

It was a rainy and cold Friday!

5

Next I got started on breakfast for the kids. I made them a bowl of my vanilla, cinnamon and brown sugar old fashioned oats. This is one of their favorite meals that in a pinch (like at the end of the biweekly grocery haul when you’re scrambling for meal options), I can feed them anytime of the day without any complaints. I always have these ingredients on hand, it’s easy and fast!

6

While I worked on breakfast the boys played with legos.

Once breakfast was ready, everyone sat down to eat (and read…Jaden is my little bookworm).

This little girly had some teeth pop up!! See it?

26

After breakfast the boys get ready for the day (this is also usually when I like to get myself ready.

After that we work on chores…look at that mess! A certain someone had some dried mud caked to his boots and when he put them on INSIDE to take out the recycling…well…there was some extra housework for me, lol. Apparently I need to be more specific about where to stomp the mud off!

14

I also took a few minutes to work on laundry while Evi played and the boys finished chores.

Then around 10:30 we started school. This day we only had group work to do. We’d completed all of the core subjects like spelling and math earlier in the week.

We were continuing on with our bird unit study. We combined nature study and art for a little project.

We had a few other things to do for school and then we had lunch break.

23

Because we were running behind all morning and it was already about 1:30 by this point, we opted for our “snack lunch” rather than what we had on the menu. This is a favorite quick meal at lunch for my kids.

27

I started grading (I’m a little behind at the moment) but then had to get back to other things like prepping for our Friday night pizza).

The sour dough crust has to sit for a while so I like to do it several hours before I need to use it.

2425

After that we read aloud and then the kids played with legos some more while they waited on me to finish some chores around the house.

Evi girl kept her mamma company through it all. She’s so close to crawling!

After this point, it’s all a blurr honestly, lol. I remember finishing up some laundry (mostly putting it away). I kind of lost track of time but I think it was likely around 6:30 or so. I went ahead and started the pizza at that point and let the boys start watching “Little House on the Prairie” episodes. That’s been our Friday night family activity lately. They love it.

29

I ended up making one half veggie/half pepperoni pizza and one cheese pizza since Josh wasn’t there to have any. Usually I make three or four pizzas and then we can have leftovers for lunch on Saturdays.

28

30

31

We ate our pizza on the couch and watched a couple more episodes before the boys went to bed and then Evi and I cleaned the kitchen and fed the sour dough starter. We jokingly refer to it as “sour Sam” since it requires food and water like the rest of our pets. 🙂

sour dough

32

After that, we went to bed too. We were all ready to just get to Saturday to have Daddy back home with us! We kind of like him! ❤

I hope you enjoyed a little glimpse into a normal day for us. I’ve always enjoyed seeing what a normal day looks like for other moms. There’s always something to learn from each other and sometimes it’s nice to just see that we all have things like laundry piles and muddy kids boots and dinner messes!