Weekly Menu Plan: FREE Printable

IMG_0878

We’re continuing on with our “Feeding a Family” theme and today we’re talking MENU PLANS!

Let me start by saying…menu planning is NOT my favorite thing to do. There…I said it. In fact, I can usually find 500 other things I need to do like now instead of planning the menu. The thing about it is, I know it benefits me so much to have a game plan for the week ahead.

Additionally, there are so many different styles of menu planning that it’s going to take time to find the “right” way to do it for your family.

Oh, and then there’s that whole as seasons change, so must your meal plan. Ha.

So…I think what I’m trying to get at is. Meal plans are good. Very good actually, BUT…you shouldn’t be so rigid about it that you can’t allow for life to happen and change plans. Because really, that would defeat the purpose of that meal plan, wouldn’t it?

The best recommendation I can make for you is this, shop around and pull ideas from lots of folks. Find the one that best fits your family and the current season you’re in (i.e. babies, picky eaters, eat you out of home(ers) or all the above).

Remember why you’re doing it in the first place. To help your family eat well and avoid unnecessary stress about what to feed that little army of yours.

IMG_0732

Keep it simple and don’t forget to add in some fun things…make sure everyone in your family can find something in the mix to get excited about. Trust me, you won’t please every member every day and some days you may not please anyone BUT a good meal plan will help you overall make it easier on you to please them and feed them healthy more often.

Ok. now that all that is out there…here’s a basic run down of how I plan:

*I usually plan my meals Sat/Sun because since Covid craziness became a thing I’ve been shopping weekly on Saturdays (I used to shop biweekly at multiple stores). Now I go to one store and order anything I can in bulk from Amazon. I start planning before I go shopping and then I finalize it after I get back because I still seem to have trouble finding everything I planned to use for meals at one store.

*We have a couple of meals that we do each week like “Friday night Pizza night” & “Taco Tuesday”. This is both fun and gives me a couple of “freebies” each week.

IMG_0681

*I try to have a couple of “back ups” on my radar and in the pantry and freezer. Think homemade Einkorn PBJ or “snack lunch”. Again, life happens and with four kids…it happens a lot and the whole point of all of this is to make life easier not more stressful, right? RIGHT.

*If something from the meal plan doesn’t end up getting used I shift it to the next open day and if necessary sometimes I switch meals from one day to the next…for example, this morning I made tomorrow’s breakfast because I was running behind and tomorrow I’ll make today’s instead.

*Don’t forget to plan what snacks you’ll have available for the week (if you have small kids you know what I’m talking about).

*It’s also a good idea to plan for a couple of desserts for the week too. Who doesn’t enjoy a nice treat a few times a week. And…if you at least plan to bake something you can make sure you have all of the ingredients at home when you go stock up for your week of meals.

donut

As you can see, I’m pretty easy going when it comes to my meal plan. I don’t have time or mental space for complicated things right now so simple is how I prefer things. If you’ve never done a meal plan but you’re interested in starting one, you can give this little worksheet a try. I created it especially for ya’ll (well…and myself). It is super simple and embarrassingly basic (don’t judge me) but it follows the basic principles I outlined for you and it will get you going.

Weekly Menu Plan

Happy planning people! ❤


Bagels From Scratch

One of the best things I ever did for myself and for my family was taking meals that we already love and making healthier versions of those things at home from scratch.

The next best thing I did for us is make a list of regulars for each meal that we rotate through on the weekly meal plan.

As promised, we’re starting off with breakfast and at the conclusion of the series we’ll give you all a free printable e-book with all of the recipes we’ve discussed OR you can just print each of the ones you love most right from the blog post.

Today we’re talking about one of our favorite breakfast items to make, Bagels. Fresh bagels straight from the oven with a nice cream cheese or homemade butter and jam are an AMAZING breakfast. Even my picky eater approves. Not only do they work wonderfully for breakfast, but those left over breakfast bagels can easily be turned into a bagel sandwich for lunch.

A couple of things you’ll want to consider:

  • Fresh baked goods will not store the same as the store bought versions. At most I can get 2 days out of homemade breads because they contain no preservatives. Typically when we bake breads here at our house, we eat them the same day OR we freeze them the same day and then stick them in the oven when we’re ready to eat the rest.
  • Use good flour…I finally bit the bullet and bought myself a grain mill this year so I can use the best quality of grains possible but if you can’t take that step, just make sure you’re getting the most nutricious flour you can afford. There are many reasons why freshly ground flour is the best option nutritionally speaking but it is a big investment. Consider using jovial foods or something like it to order a good quality flour. Check it out here: https://jovialfoods.com/organic-einkorn-all-purpose-flour-2lb/ 
  • When you’re baking breads, you have to know what breads require a higher gluten content. It’s certainly possible to use a low gluten grain like Einkorn alone for bagels but for us, we prefer to do half Einkorn and half white hard wheat. It gives us the texture we’re looking for and a great flavor.
  • Some breads require a little extra time and a few steps. Bagels are one of those. Consider making these in bulk, partially baking them and letting them cool. Store in the freezer and then pull them out and bake the rest of the way when you’re ready for more.

Let’s get started:

Homemade Bagels

bagel

*I’m using a blend of Organic Einkorn flour (freshly ground) and Hard White Wheat (freshly ground). You will need to experiment a little to get the texture and flavor your family prefers but generally a mix of both a good All Purpose flour and Bread flour (for gluten) works well. I usually do a 50/50 mix.

Preheat your oven to 415 degrees Farenheit & prepare a large pot of water for boiling the bagels.

1 1/2 tsp yeast

1 1/4 c water

1tbsp pure maple syrup

4 cups flour

1tsp salt

Add yest and approx. 1/2 cup warm water to mixing bowl along with the maple syrup and let sit for 15 minutes until bubbly.

Add in the remaining ingredients and mix until gluten is well developed (dough is good and stretchy).

Let the dough rise for approximately 30 minutes.

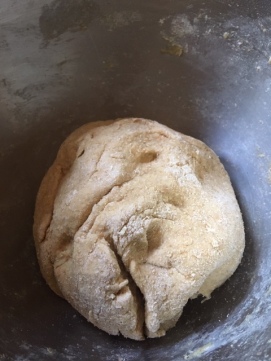
bagel dough

Separate into 9-12 even balls of dough and let rest for a few minutes.

dough balls

Shape into bagels and let rise for another 30 minutes.

shape

**you need to pinch the dough ends together to make sure the bagels hold their shape**

shaped

risen

Boil the bagels for 2 minutes on each side.

boiled

Bake for 20-25 minutes or until golden brown.

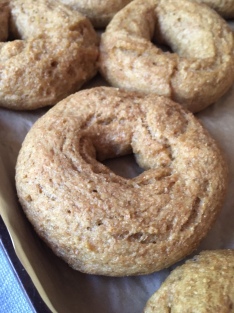
baked


For the Love of Food: Feeding a Family

Feeding a family is both a great joy and a big job. There are so many factors to consider. Family size, family budget, likes and dislikes. How much time can you allot for meal prep and clean up? All of these things are important to consider.

The larger your family, the more planning has to come into play. Meal time looks much different now with four children than it did years ago when we only had one. The more people you’re feeding, the more opinions and requests, likes and dislikes threaten to make meal times a daily challenge.

Additionally, there’s the food boredom that strikes when meals become too repetive. Food is meant to be enjoyed and special. It holds the potential to bring you back in time just as your favorite songs do.

Oh and let’s not forget that we want to ensure the food we are serving our loved ones is also nourishing their bodies. So many of the easy, prepackaged convenience type foods we buy from the store do nothing for us besides fill our stomachs for a time. There’s very little those foods actually do for our health.

Some days your creative juices are flowing and meal ideas come naturally, other days there isn’t a thing in the cupboards or fridge to strike your fancy.

oatmeal

Making mealtime something special and nourishing is possible. It’s not always easy and some days you’ll need to look for inspiration, but take heart, with a little planning and trial and error it can be done.

So how do you get started? 

  • Love food for more than a full stomach. Love the beauty it offers…the nourishment and enjoyment. Food is such a vital part of our lives, we might as well enjoy it.
  • Remember why you’re doing it. You have been given the joy and responsibility to feed your people nutricious and delicious foods.
  • Don’t get overwhelmed and don’t compare yourself to gourmet cooks if you’re just getting started. Start small. Stick with it and you’ll get there.
  • Learn all you can…Pinterest, Youtube, Blogs, Books…there’s a wealth of information at your fingertips.
  • Practice, practice, practice.
  • Give yourself grace and allow yourself to make terrible meals and messes. Even the best cooks and bakers make inedible creations from time to time.

Over the next several weeks I’m going to take you all through some of our “regulars” on the meal plan to offer a few ideas and inspire you. We’ll start with breakfast, then lunch and lastly dinner.

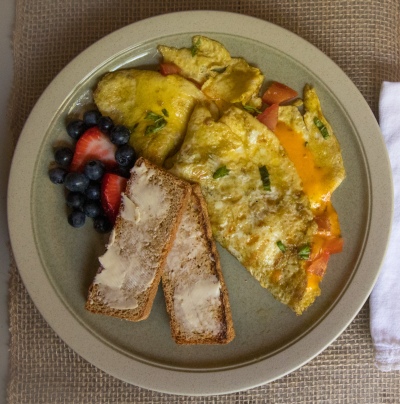
omelette

We’ll also look into some different types of meal planning forms and share recipes for some of our favorite meals.

My hope is that you’ll leave here feeling refreshed and inspired. Ready to cook…and EAT!


Chocolate Chip Scones Recipe

scone 2

I have a tasty breakfast treat for you all today! These delicious scones are made from 100% homeground whole wheat flour (though you can certainly subsitute store bought whole wheat flour as well). They taste just about the same as a chocolate chip cookie, just slightly less sweet. Not only are they delicious, they are super easy to make and take only a few minutes to bake. Perfect for a weekend breakfast treat!


Chocolate Chip Scones

  • Servings: 8
  • Difficulty: easy
  • Print

scone

2 cups flour (I used freshly ground hard white wheat)

3/4 cup dark brown sugar

1/2 tsp sea salt or pink himalayan salt

2 1/2 tsp baking powder

1/2-3/4 cup of semi-sweet chocolate chips

1/2 cup butter (cold)

101/2 tsp vanilla (pure vanilla)

1 egg

1/4 cup heavy cream (you can substitute milk if you don’t have cream, but the cream does make a tasty scone)

** you may find that you need slightly more cream…after adding the first 1/4 cup, add a tablespoon at a time extra if needed to make the mixture come together**

Step One:

Preheat oven to 400 degrees

Combine all dry ingredients (flour, salt, sugar, baking powder and chocolate chips)

Step Two:

Combine your wet ingredients (egg, cream, vanilla)

Step Three:

Cut in cold butter to the dry ingredients

Step Four:

Combine your dry ingredients and wet ingredients

Step Five:

Shape the dough into a slightly flat circle and cut into eight pieces with a pizza cutter

Step Six:

Bake on 400 degrees for approximately 20 minutes or until golden brown

Enjoy! 🙂

Homemade Butter & Buttermilk

I’ve been baking bread for a long time. The store bought stuff just doesn’t compare. It’s worth the extra time and work every time! So what do you do with a fresh loaf of homemade bread?! You pair it up with some fresh homemade butter, of course! It sounds crazy…making your own butter, I know. A couple of years ago I was a little nervous to try it. If you have a mixer, it’s basically making overwhipped whipped cream! Within a few minutes you can turn a 32 oz bottle of heavy cream into about two sticks of butter. Just make sure to stay by the mixer because it goes pretty quickly and if the mixer is turned up too high it’ll make a terrible mess. I recently stepped away for a “second” to change a diaper and returned to buttermilk splashed all over the mixer, the counter, the floor. It wasn’t pretty.

Here’s what you need:

32 oz bottle of heavy cream

bottle or jar to store the buttermilk in (I reused a bottle from juice)

mixer with whisk attachment

butter dish and parchment to store the finished butter in (I put one in the dish and store the other in parchment in the fridge)

butter 1

Step One: pour the whole bottle of cream into the mixer and set to about medium speed.

butter 2

You can see the bubbles starting to form.

butter 3

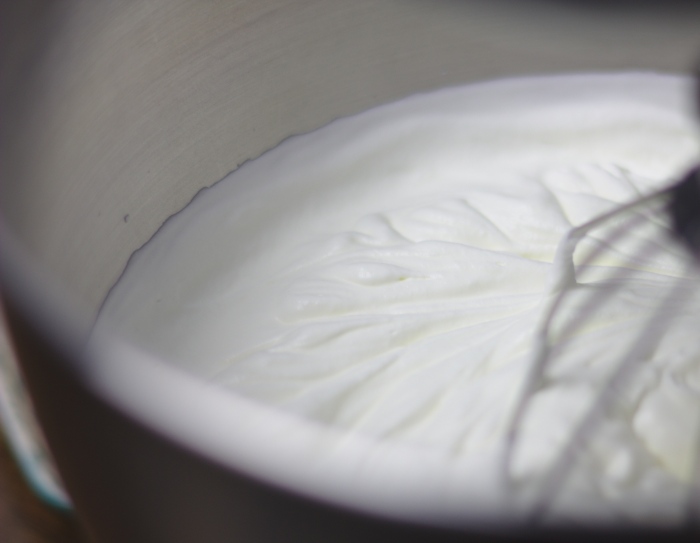
Getting close to “soft peak” whipped cream.

butter 4

butter 5

Step two: Here we’re at about overwhipped whipped cream stage. At this point I would turn the mixer down just a little.

butter 6

butter 8

It’s getting thicker now. Not much longer before it starts to separate.

butter 9

butter 10

Step three: it’s separating now and most of the solids will stick to the whisk attachment.

butter 12

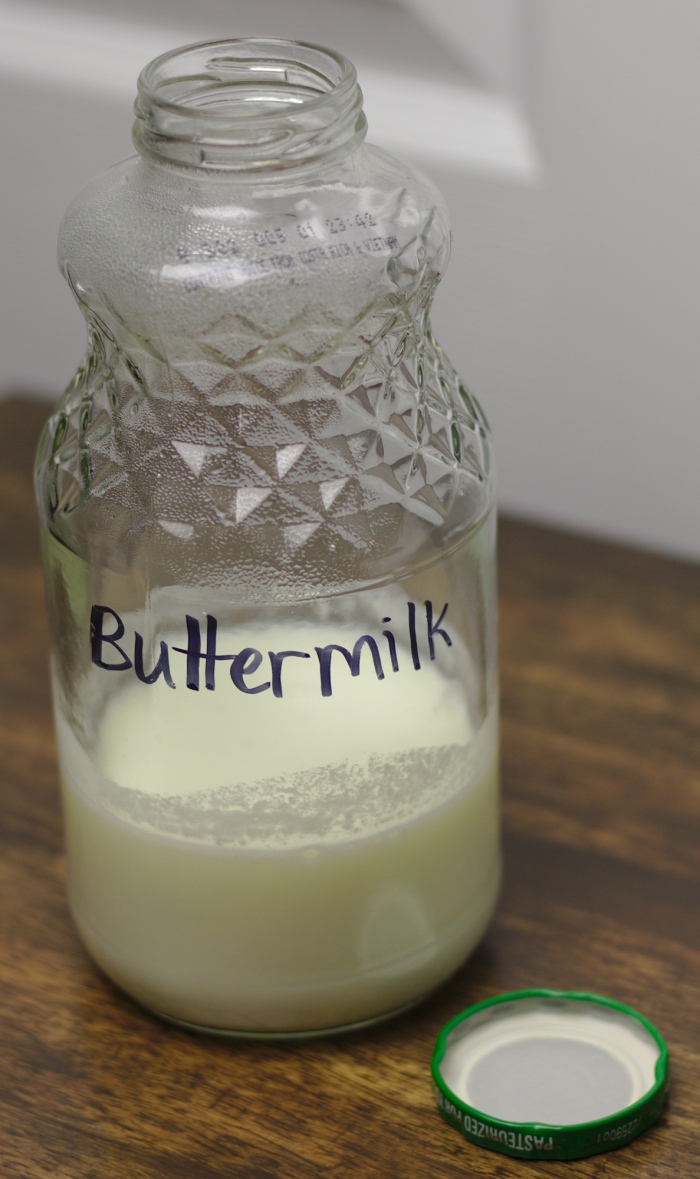
Check out that buttermilk! It’s great for biscuits, pancakes, homemade ranch and more!!!

butter 13

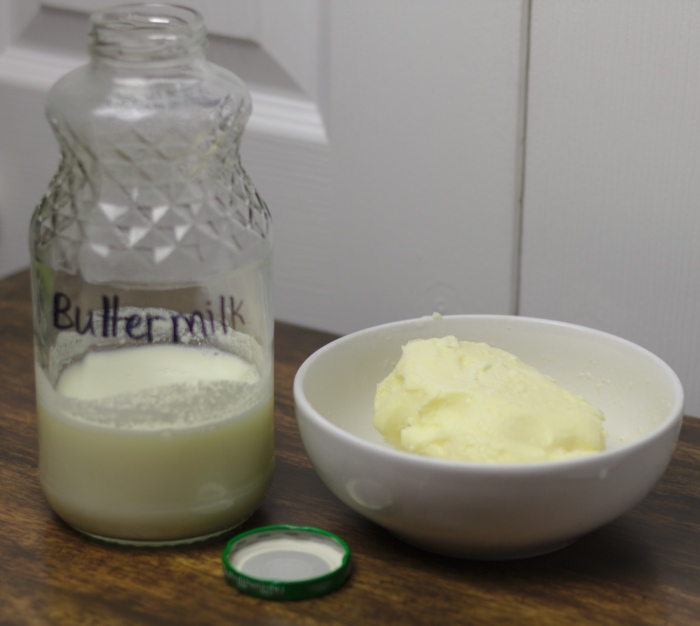
Step four: take the butter out of the mixing bowl and work out the rest of the buttermilk using either your hands or a wooden spoon/spatula.

butter 15

Step five: shape the butter the way you like it. Sometimes I leave it like this but most of the time I separate this into two sticks of butter.

butter 16

Step six: pour buttermilk into your jar or bottle. I generally prefer glass over plastic.

butter 17

There you go! Six easy steps to fresh butter and buttermilk!

butter 18

Now make yourself some English muffins and enjoy! 🙂

english muffin

Homemade Sour Dough Tortillas

Today I’m sharing a family favorite with you guys! We thoroughly enjoy a good burrito in our house! They’re even more tasty (and healthy) with these homemade sour dough tortillas.

So let’s get started…

What you’ll need:

*see full recipe and instructions at the bottom of the post

  • all purpose flour (I prefer something unbleached like the King Arthur or Arrowhead Mills Organic)
  • salt (I like either a regular fine sea salt or fine pink himalayan)
  • olive oil (just a plain old olive oil will do)
  • water (I typically use hot water)
  • sour dough starter (you can omit this if you prefer to make them without it, just use less flour)

A few notes…

This is a great recipe for beginners because there’s truly not much to it! The hardest part is rolling out the tortillas thin enough and getting them flat in the pan. That just comes with practice. After the first few it’s smooth sailing. The dough is so simple to make, anyone can do it. There’s no special technique required! Make sure your pan is good and hot but not too hot. I prefer a cast iron skillet. Here’s what I use:

https://grocery.walmart.com/ip/Lodge-Pre-Seasoned-12-Inch-Cast-Iron-Skillet-with-Assist-Handle/5969633

The tortillas usually keep well in a ziplock bag for about a day or two.

That’s pretty much it! So easy!

Here’s a few photos of the process:

Tortilla

OSFL_02

OSFL_01

OSFL_03

OSFL_04

Homemade Sour Dough Tortillas

  • Servings: 10-12 tortillas
  • Difficulty: easy
  • Print

OSFL

Ingredients:

4 to 4 1/2 c all purpose flour

1 1/2 tsp sea salt

1/2 c sour dough starter

1/4 c olive oil

1 2/3 c hot water

Directions: 

  • Combine all dry ingredients in a mixing bowl (Start with about 4 cups of the flour and add more if necessary)
  • Add in sour dough starter
  • Add in olive oil and hot water
  • Combine (add additional flour to dough until it’s no longer sticky)

**Generally when I make this recipe I like to allow the dough to sit for a few hours prior to making the tortillas to maximize health benefits from the starter, but if I’m in a pinch and I need them fast, I’ve made them right away with no problem at all. The beautiful thing about these tortillas is that they don’t need to “rise” so they don’t take nearly as long as a loaf of sour dough bread.**

Flour the surface you’re working on and set out your dough,

Separate into 10-12 small dough balls.

Roll out the dough balls very thin and place in the skillet. Cook for 1-2 minutes per side on medium heat.