Bagels From Scratch

One of the best things I ever did for myself and for my family was taking meals that we already love and making healthier versions of those things at home from scratch.

The next best thing I did for us is make a list of regulars for each meal that we rotate through on the weekly meal plan.

As promised, we’re starting off with breakfast and at the conclusion of the series we’ll give you all a free printable e-book with all of the recipes we’ve discussed OR you can just print each of the ones you love most right from the blog post.

Today we’re talking about one of our favorite breakfast items to make, Bagels. Fresh bagels straight from the oven with a nice cream cheese or homemade butter and jam are an AMAZING breakfast. Even my picky eater approves. Not only do they work wonderfully for breakfast, but those left over breakfast bagels can easily be turned into a bagel sandwich for lunch.

A couple of things you’ll want to consider:

  • Fresh baked goods will not store the same as the store bought versions. At most I can get 2 days out of homemade breads because they contain no preservatives. Typically when we bake breads here at our house, we eat them the same day OR we freeze them the same day and then stick them in the oven when we’re ready to eat the rest.
  • Use good flour…I finally bit the bullet and bought myself a grain mill this year so I can use the best quality of grains possible but if you can’t take that step, just make sure you’re getting the most nutricious flour you can afford. There are many reasons why freshly ground flour is the best option nutritionally speaking but it is a big investment. Consider using jovial foods or something like it to order a good quality flour. Check it out here: https://jovialfoods.com/organic-einkorn-all-purpose-flour-2lb/ 
  • When you’re baking breads, you have to know what breads require a higher gluten content. It’s certainly possible to use a low gluten grain like Einkorn alone for bagels but for us, we prefer to do half Einkorn and half white hard wheat. It gives us the texture we’re looking for and a great flavor.
  • Some breads require a little extra time and a few steps. Bagels are one of those. Consider making these in bulk, partially baking them and letting them cool. Store in the freezer and then pull them out and bake the rest of the way when you’re ready for more.

Let’s get started:

Homemade Bagels

bagel

*I’m using a blend of Organic Einkorn flour (freshly ground) and Hard White Wheat (freshly ground). You will need to experiment a little to get the texture and flavor your family prefers but generally a mix of both a good All Purpose flour and Bread flour (for gluten) works well. I usually do a 50/50 mix.

Preheat your oven to 415 degrees Farenheit & prepare a large pot of water for boiling the bagels.

1 1/2 tsp yeast

1 1/4 c water

1tbsp pure maple syrup

4 cups flour

1tsp salt

Add yest and approx. 1/2 cup warm water to mixing bowl along with the maple syrup and let sit for 15 minutes until bubbly.

Add in the remaining ingredients and mix until gluten is well developed (dough is good and stretchy).

Let the dough rise for approximately 30 minutes.

bagel dough

Separate into 9-12 even balls of dough and let rest for a few minutes.

dough balls

Shape into bagels and let rise for another 30 minutes.

shape

**you need to pinch the dough ends together to make sure the bagels hold their shape**

shaped

risen

Boil the bagels for 2 minutes on each side.

boiled

Bake for 20-25 minutes or until golden brown.

baked


For the Love of Food: Feeding a Family

Feeding a family is both a great joy and a big job. There are so many factors to consider. Family size, family budget, likes and dislikes. How much time can you allot for meal prep and clean up? All of these things are important to consider.

The larger your family, the more planning has to come into play. Meal time looks much different now with four children than it did years ago when we only had one. The more people you’re feeding, the more opinions and requests, likes and dislikes threaten to make meal times a daily challenge.

Additionally, there’s the food boredom that strikes when meals become too repetive. Food is meant to be enjoyed and special. It holds the potential to bring you back in time just as your favorite songs do.

Oh and let’s not forget that we want to ensure the food we are serving our loved ones is also nourishing their bodies. So many of the easy, prepackaged convenience type foods we buy from the store do nothing for us besides fill our stomachs for a time. There’s very little those foods actually do for our health.

Some days your creative juices are flowing and meal ideas come naturally, other days there isn’t a thing in the cupboards or fridge to strike your fancy.

oatmeal

Making mealtime something special and nourishing is possible. It’s not always easy and some days you’ll need to look for inspiration, but take heart, with a little planning and trial and error it can be done.

So how do you get started? 

  • Love food for more than a full stomach. Love the beauty it offers…the nourishment and enjoyment. Food is such a vital part of our lives, we might as well enjoy it.
  • Remember why you’re doing it. You have been given the joy and responsibility to feed your people nutricious and delicious foods.
  • Don’t get overwhelmed and don’t compare yourself to gourmet cooks if you’re just getting started. Start small. Stick with it and you’ll get there.
  • Learn all you can…Pinterest, Youtube, Blogs, Books…there’s a wealth of information at your fingertips.
  • Practice, practice, practice.
  • Give yourself grace and allow yourself to make terrible meals and messes. Even the best cooks and bakers make inedible creations from time to time.

Over the next several weeks I’m going to take you all through some of our “regulars” on the meal plan to offer a few ideas and inspire you. We’ll start with breakfast, then lunch and lastly dinner.

omelette

We’ll also look into some different types of meal planning forms and share recipes for some of our favorite meals.

My hope is that you’ll leave here feeling refreshed and inspired. Ready to cook…and EAT!


Simple, Natural & Low Waste Dental Hygiene

Dental 1

There’s a lot more to oral health and hygiene than sparkly white teeth and fresh breath (though both of these things are quite wonderful). An unhealthy mouth can increase your chances of many other health issues. Cavities and gum disease are known to result from poor oral health, but heart disease, cancer and diabetes are also believed to be linked to the same. Keep in mind that genetics may also either work in your favor or against you. Some of us come from a long line of unhealthy teeth and gums and as a result have to work extra hard to minimize the damage to our health. Regular brushing, flossing and cleanings are the best way to prevent dental issues, so choosing the right products for oral care is essential.

If you’re like me, you want your products non-toxic…but powerful. We’re also on a mission to live a more “low waste” lifestyle so things like packaging and the material of the product itself are important to us. Those three factors play heavily into what we’ve chosen to use for dental care.

Here’s what we’ll cover in today’s post:

  • toothbrushes
  • toothpaste
  • floss
  • mouthwash
  • tooth whitening

Let’s start with toothbrushes. Roughly one billion plastic toothbrushes are thrown out each year in the US. Even though toothbrushes are small, that’s A LOT of plastic!! I consider myself to be a little bit of a realist in regards to waste (I don’t think the “no waste” movement is practical or feasible in today’s culture) BUT I am very much aware of our culture’s lack of stewardship and the havoc it’s wreaking on our environment. GOD has blessed us with a beautiful world to enjoy and as believers it is our responsibilty to be good stewards of the Earth while on it. So while I realize some plastics are necessary, I want to do better to avoid it when possible and choose biodegradable options when I can.

Because we are trying to do better as a family in regards to stewardship, a while back we switched to eco friendly toothbrushes and haven’t looked back since.

Dental 2

The funny part…I have actually LOVED these biodegradable toothbrushes! I don’t know why I didn’t switch many years ago!! All of my kids like them too. I have sensitive teeth, receding gums and other issues and these toothbrushes have been far better for my teeth than their “cheap” plastic counterparts. The bristles are so soft. They have actually lasted us longer and honestly work out to be less expesnive as well. For example Oral B goes roughly $26 per 12 pack. A basic Colgate 12 pack is over $12. Now prices will vary slightly of course depending on where you purchase your brush but either way, the biodegradeable version was certainly no more expensive than the plastic version at roughly $12-15 per 12 pack. I reccently purchased the EVE ECO brand brushes for $9.99 on Amazon!! For us, there’s no going back to the plastic. As strange as it sounds, I have fallen more and more in love with the look of the natural products than any of the colorful plastic options out there! There’s something about the natural wood that I just love!

Ok so toothpaste…this one I’m still researching DIY recipes and I’m going to be switching to a DIY version asap because I think I can make a more cost effective but powerful version without all of the packaging that ends up in the landfill. Small glass jars are perfect for DIY toothpaste and can be reused over and over again.

As I imagine most kids do, my kids use way too much toothpaste. Someone is always either dropping it on the counter, in the sink or on the floor (occasionally even on a sibling…I don’t know how they manage it but they do). While I want to save as much money as I can, I just can’t make peace with the chemical laden toothpaste that’s less expensive. For years I went back and forth as the budget got tighter and tighter the more kids we added but over the last few years I’ve cut out every possible unnecessary expense I can in order to afford toxin free products.

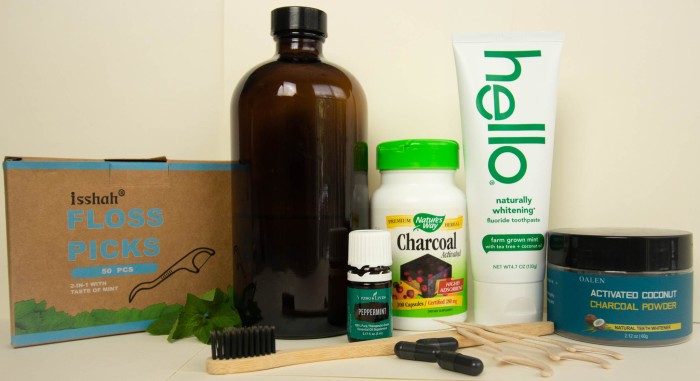
While I’m excited to try a DIY toothpaste, I need to buy myself some time to do more research and try out different recipes, so in the meantime, we’ve been using the HELLO brand toothpaste. It works very well, has a nice and minty flavor that leaves your breath much more fresh than Colgate or Crest ever did. I ordered it from Amazon and it was reasonably priced there ($15.88). Crest and Colgate were anywhere between $8-16 on Amazon for a 4 pack so the natural version wasn’t much more expensive and I find myself using less of it because it is more potent.

Dental 5

Next, let’s talk about Floss. We have always preferred the single flossers (mostly because it’s much easier for our kids to use) but to be honest, I like those better as well. The problem is, just like the toothbrushes, they create a large amount of product that ends up in the landfill. I don’t like that. Enter these fantastic little flossers I found on Amazon:

At $14.99 for 200 of them, they are not terribly expensive and they work very well! They’re made mainly from cornstarch and packaged in eco friendly packaging. Since I’m not likely to DIY my flossers in the future, I consider these guys a winner!!

Dental 3

Now let’s talk about mouthwash. For years we’ve used Tom’s mouthwash which worked very well and we liked using it, BUT at $4 per bottle and 5 people using it (including littles who either used too much or occasionally spilled half a bottle down the drain) it got to be a bit costly. Additionally, the mouthwash comes in plastic containers which I honestly want to get away from.

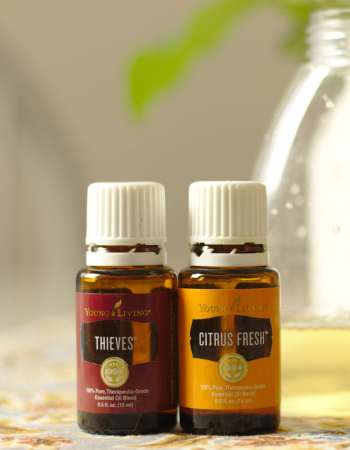
So I got myself some glass bottles from Amazon, used my trusty YL Peppermint oil, baking soda and some water and made my own mouthwash for very little cost. I will say, without added sweetners and other ingredients, this mouthwash is very potent and will require a little getting used to BUT it works very well at freshening your breath and is very cost effective. The kids were not a huge fan at first but they got used to it.

There are numerous different versions of DIY mouthwash to choose from on Pinterest. Some are made using Thieves oil instead of Peppermint, Tea tree oil and some using clove. You could also include Copaiba oil if you have issues with inflamed gums (which I sometimes do).

Lastly, let’s talk about tooth whitening…

I love a good cup of coffee. I survive on coffee some days. I look forward to it in the morning, around lunch and in the afternoon. With 4 young kids and very little sleep…some days I may have up to 4 cups a day (I jokingly tell the kids that as I’ve had each kid I’ve needed to increase my number of cups per day to match the number of children). Unfortunately, coffee stains teeth. So while I’m not about to use those over priced, chemical laden tooth whitening kits EVER AGAIN, I want white teeth!

Boy do I wish I had known half of what I know about beauty products and toiletries now when I was younger! All the chemicals I put on and in my body!

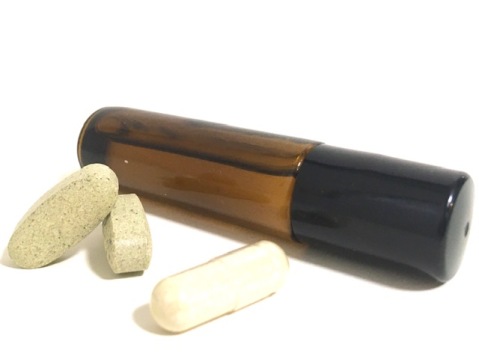
Fortunately there is a natural, very effective option out there to whitening those teeth!! I’ve done both DIY and purchased activated charcoal whiteners. If you’re not a DIY fan, this one by Oalen is super inexpensive (I think I paid $5.99 and it came with a biodegradeable toothbrush), works great and lasts a long time because you only need a tiny bit at a time. Use it roughly once per day (or a couple of times a week if you have my memory).

If you want to save a few dollars, buy some activated charcoal, pure unrefined coconut oil and a glass jar…mix and brush. It’s as simple as that!

Btw…it wouldn’t hurt to have some activated charcoal capsules on hand for stomach bugs and food poisoning anyway…just thought I should share that.

Do some research on that one 🙂

Dental 4

So there you have it! Natural, effective and affordable dental care with the added bonus of being low waste.

If you have any other great products or tips for dental care to share, please tell me in the comments below! 🙂

Slow, Simple & Intentional

f

I was going to post an update on the garden, in fact I’d even started writing it multiple times, but each time I start writing, I keep coming back to this topic. It’s been a bit of a personal mission for our family for some time now and we’re still working to figure it all out but it’s the story of the blog. The name and the why.

Scripture is a large part of our family’s life and while we would never claim to live it out flawlessly, it is the driving force behind all that we do. Because of it many will never “understand” us and many will disagree, even ridicule our choices. Nevertheless, we strive as a family to live differently from the world and are learning more about what that looks like each day.

“I have seen all the things that are done under the sun; all of them are meaningless, a chasing after the wind.” Ecclesiastes 1:14

Many years ago, even before our first son was born, I remember reading this scripture from Ecclesiastes. I remember it struck my interest…and digging into it more. King Solomon, was powerful and wise…he’d done it all and seen it all. Much like most of us are striving to become and do. Participating in the daily race for more and success.

He’s speaking of our material pursuits while here on earth and how no matter how hard we work or how much we work…these things are all like chasing after the wind…the wind which cannot be caught. Materially, we can never have enough. We’re always striving for more success, fame and fortune. Big, shiny, flashy, fancy…popular…fast…disposable. These words and many others come to mind when I think about what’s considered desireable today.

This fast paced, make lots of money so you can buy all the things, don’t get your hands dirty, hire it out, eat it out and grow apart lifestyle that has been made the norm is meaningless…a chasing after the wind. A life wasted.

Marriage is all about my needs being met. Children are a nuisance and anything that requires work is undesirable. This is more often than not the norm of today’s world. Even in the church.

We’ve decided that want to live slower…not because we’re better, because we desire more.

…a marriage that is valued and fits into the schedule. Children that we invest in, even when it’s inconvenient and hard…take the time to raise and teach and cherish.

d

We want to live simply without the bells and whistles and do as much of it ourselves as we’re able. The cooking the cleaning, the fixing. When did such things become beneath us? There’s dirty, hard work yes, but satisfaction too.

Homemaking and raising children is not a life wasted, it is the ultimate career.

home

“The homemaker has the ultimate career. All other careers exist for one purpose only – and that is to support the ultimate career.” CS Lewis

Living intentionally in terms of devoting our lives to God’s plan no matter where that takes us, a strong marriage that outlasts the disposable nature of our lost world and striving to raise up godly children who love and appreciate the little things that the Lord has blessed them with.

“We are all meant to be naturalists, each in his own degree, and it is inexcusable to live in a world so full of the marvels of plant and animal life and to care for none of these things.” Charlotte Mason

So what does that look like for our family, right now in this season of life?

us

Family time…as much as we can manage. The six of us…as much time together as possible because these children grow up too fast. Of course work and visits and appointments and such are a part of life but we have chosen to prioritize the time we have together.

s

Of course not everyone will agree on this, but for us schooling the kids at home enables us to have even more time together, teaching them about the things that we feel are important and gives them the extra opportunity to slow down and play more while they are little.

“I learned more about Christianity from my mother than from all the theologians in England.” John Wesley

Get dirty…imagine…have fun. It also enables us to take more time teaching them the things that are harder for them as well as move on faster when they naturally grasp something quicker. Less boredom is a wonderful thing.

a

Making meals with love and care at home and learning old skills…less disposable and convenience. Less artificial and more real.

c

We’re a work in progress ourselves and we fight the flesh as much as everyone else. We’re on a mission to slow down and live a simple life of chasing God’s good gifts rather than the wind…to take great care of what he has blessed us with.

It’s a journey we’re on as a family.

My hope is that through our journey others will be inspired to join along. That it will leave a positive mark in the world.


Easy Vintage Floral Banner DIY

Are you looking for some super simple ideas to spruce up your home for spring and summer? I’m always on the look out for easy and very inexpensive crafts to add charm to our home. Today I have one for you that’s as easy as can be and very inexpensive! If you’re like me, most of the supplies needed for this project you already have at home, the others are either free or a few dollars at the craft store.


banner


What you’ll need:

Twine (or yarn of your choice)

cardstock (I wanted something light and bright…this pretty cream color almost matches our walls perfectly and looks fabulous against the pretty brown antique armoire)

free printables of vintage floral

gluestick

hole puncher

Could these materials be any more simple? Now let’s create that banner…


Step One:

Choose your favorite free printables and print them…I simply typed in free vintage floral printables into google and went through a few that I liked and then chose my favorite few to print.

Something like this…

blue-and-yellow-gallery-wall-printable-art

https://www.simplymadebyrebecca.com/2015/03/16/free-printable-royal-blue-and-yellow-botanical-art/#jp-carousel-1500

or this…

printable-botanicals-

https://www.onsuttonplace.com/library-of-free-printable-botanicals/

You can even use a vintage Patriotic print like this one for Memorial Day and Independence Day:

https://www.tinkerabout.com/4th-of-july-print/

**this specific printable is formatted for an 8×10 frame but I thought it was a great inspiration for a 4th of July banner as well. I’m hoping to find some other fun freebies and inexpensive 4th of July decor and DIY’s to share with you all soon** 

Step Two:

Once you’ve printed your images, cut your cardstock and prints into whatever shape you would like. I really enjoy the triangles, but anything you prefer will work.

Step Three:

Glue your prints to the cardstock and punch holes at the top in the center.

Step Four:

String the banner and hang it.


We don’t currently have a fire place so I hang our banner on our antique Armoire in the living room but it would also look lovely hanging on a mantle or even the wall.

It’s a wonderful way to add a little extra charm and seasonal decor on a small budget.


5 Simple & Practical Ways to Use Essential Oils

If you’ve stopped by here before, you probably already know that Essential Oils are a staple in our home. We use them every day, multiple times per day. There are so many reasons why we chose to start using them and I want to do a post on that as well someday but for today I want to share 5 practical ways we incorporate them into our every day life.

Before I get started, I would encourage you to do your own research. We have done ours and have been using Young Living oils for several years now based on that research. If you have questions about eo’s or Young Living, feel free to ask in the comments. 🙂

Now, onto the 5 simple and practical ways we use our oils daily:

  1. Immune System boost: I set a daily reminder on my phone to get out our Thieves roller so the boys can put some on their feet before bed, along with taking their vitamins. I make sure it’s just before bedtime so I can make sure they’re showered and ready to go by the time the alarm goes off (most of the time anyway). You can also take Thieves internally either in a capsule or in a small amount of water. I tend to take mine orally when I feel like I’m fighting something but for the kids, the roller bottle works the best.


immunity

2. Boo Boo’s: Three boys…we have a lot of boo boos. We use a variety of oils for these            since it depends on the type of injury/ailment.

  • We use DiGize for tummy troubles by rolling it on their belly.
  • Then there’s Lavender, Copaiba and Frankincense for various skin issues (Eczema, rug burns, minor scrapes, bug bites). I also use Frankincense for my nightly skincare.
  • Deep Relief for sore legs from growing pains and other similar pains.
  • RC for congestion and sniffles.
  • I have a roller bottle with Oregano, Basil and Thyme that we use for ear aches along with a salt sock (the minerals in the coarse sea salt have healing properties as well as the heat which helps with the pressure and pain…you can add in lavender for added benefits. There’s lots of info on this one and why it works but one of my go to’s is this one: https://wellnessmama.com/59372/lavender-salt-ear-infection-remedy/). By the way, Oregano oil is one of the best antibacterial oils. It’s actually also a great remedy for skin tags…AND removing ticks! It’s a hot oil so you’ll want to research it prior to use but this is one of those oils I’d consider a “must have”.

Booboo

3. Aromatherapy: We typically have at least one diffuser going at all times while                   we’re at home. I have one in the kitchen/dining area, one in the living room and                 one in each bedroom. We diffuse everything from Grapefruit for an uplifting mood to Thieves for purifying the air and Lavender or Stress away for a calming scent. Gently baby or Aromaease for night time…there are so many others and it honestly just depends on the mood and situation.

diffuser

4. DIY Toiletries: I’ve been making many of our toiletries myself for quite some time             now. Mouthwash with Peppermint oil, handsoap with Thieves oil, Skin ointment                 with Frankincense and Lavender…Deoderant and Chapstick are next on my list of               things to try.

mouthwash

5. DIY Household products: DIY Household products are also a very big part of our daily eo ussage. I make everything from dishsoap to laundry soap and “soft scrub” with Lemon oil, to dryer balls with Lavender to replace toxic dryer sheets.

dryer ball

Getting started with essential oils can feel a bit overwhelming at first. Start small. Invest in a good starter kit and get familiar with a few staples. Then add a few more at a time. Do your research and invest in some educational books on oils.

I hope you’ve found this post helpful and if any of you are interested in trying out Young Living, please feel free to let me know in the comments and I’d be happy to help! 🙂

For the month of May, while supplies last, YL is giving away a free Lushious Lemon handsoap with the purchase of a Welcome Home starter kit, CBD starter kit, Ningxia starter kit or Oils Premium starter kit with a Dewdrop or Dessert Mist diffuser.

Let me know in the comments if you have any other questions about how we use our eo’s. 🙂


Silence

It’s been silent for a few weeks around here. Everything is fine and everyone is well, thankfully. Somehow even with social distancing and quarantine and all we have been so busy with school and work and projects that time has simply raced by. Before my unintentional break, I’d been working on multiple posts that I had hoped to get out a while ago (including a sour dough starter tutorial for a friend), but I’d run into issues with the photo editing program I was using and had to upgrade. If you look at the photos from my last post compared to the others…you’ll see what I’m talking about.

After that we just got so busy trying to catch up on other things and adjusting to the current normal. While much of our school and work routine hasn’t changed, our grocery shopping, errands and meals etc have had to be adjusted. It’s certainly a minor inconvenience compared to many peoples circumstances and by no means do I want to come across as complaining. It has however, changed some things significantly and we’re trying our best to figure out the best way to do things affordably with the best possible nutrition etc. It’s simply been a season of adjustment and it’s left us feeling a little…

evi

This may get long, so brace yourselves. I’ll start with an update on what’s been going on around here and then I’ll end with some things I’m hoping to do here with the blog and such. 🙂

First, I killed my trusty sour dough starter(insert sad face and tears)!! This was such a good starter and made us so much bread and pizza… and I could have cried! Technically I didn’t kill it, I’m pretty positive it was the cheap/bleached flour (all that was left at the store). It was doing wonderful until I started using that flour and then within days of using it my starter was dead. I tried to revive it but it was too far gone. Rest in peace “Sour Sam”, you’ve been good to us.

sour dough

Second, I’d wanted to purchase a grain mill for years and just hadn’t…mostly due to the investment, but given the flour shortage, thanks to Covid, I took the leap and ordered one. FINALLY. Naturally EVERYTHING is currently on backorder (I was a little late on acting on my instinct to purchase one and I’m on my second attempt to order one that’ll arrive before 2021).

After research and much debate, we decided to go with this guy. It was either this or the Wondermill but that one was simply too big and bulky for our small kitchen. I’m pretty excited to try out our Nutrimill Harvest.

NutriMill Harvest Grain Mill with Gold Trim

On that note, once this guy gets here, I’ll be starting a new sourdough starter with homeground flour. I’ll keep you posted on all of that.

I’m still planning to create a “How to create your own starter” post and I may even retake all of the photos since I want to wait until I can grind my own grains. I’m curious to see the difference in the starter with the fresh ground flour.

In other news, school is going well mostly. We’re trying to wrap up the school year as far as core subjects go. We started year round schooling with a month long break in June as of this past year so we’re going to be starting the next grade come July. My oldest will be taking his first standardized test in the next couple of weeks (as per Georgia law). We have received it and we’re both a little anxious about it but after having looked it over, I think he’s going to be just fine. There’s that part of me that has to fight off the thoughts of “what if I didn’t do enough for him to prepare for this…what if I’m not a good enough teacher…” but the reality is the test is there to let us know where we stand and it can be a very useful tool in helping me know where he’s excelling and where he needs more work.

Just look at them…lol. Ask me how many times per week I’ve been cleaning their bathroom, go ahead. It may or may not have been part of the reason for the silence.

dirty

bike

We’ve been spending a lot of time outside, as you can probably tell. This is the time of year that makes us just want to play in the garden all day. Warm sun, cool breeze…ahh.

Speaking of garden, we’ve planted one, a relatively small one this year. We’d had a lot of issues with our last one so we wanted to be a little cautious this year and see what we can do. We’re going to have (hopefully), cucumbers, tomatoes, kale, broccolli, cauliflower, radishes, herbs and some flowers for cutting. I’m also trying to get some lettuce and celery going. I’ll keep you posted on how all of that progresses.

Here’s some of the herbs that I started inside. I really love baby plants. ❤

babies

I told you it’s been busy around here. I never realized how busy quarantine could be! Of course I also never really thought any of us would have experienced quarantine, period.

Coming up next, is a collection of resources and activities that I’ve come across while working on some research for our church’s Cubbies class. In case it interests any of you who may be homeschooling or just looking for activities to do with your little ones this summer I thought it may be a fun post to share since summer is quickly approaching.

Until soon friends. Stay safe and healthy! Also, if you’re at all interested in Young Living Essential Oils, feel free to visit my new Instagram page dedicated to YLEO! Look for it at @wholelivingwithoils! 🙂

Of course also remember to check out my regular Instagram @oursimplefamilyliving!

Much love,

Nadine

Easy DIY Handsoap With Essential Oils

soap2
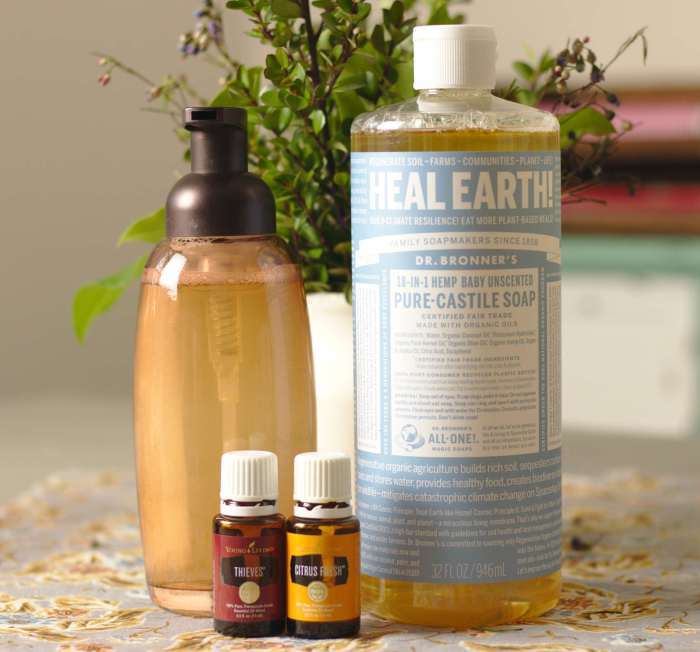
Let’s talk about handsoap. It plays a very important part in keeping our family healthy. Particularly in light of all that’s currently going on in the world with this Coronavirus. I’ve seen friends posting on facebook and instagram about stores running out of handsoap and having to go to multiple stores to find some over the last few weeks so I wanted to share this quick and easy DIY handsoap tutorial because handsoap is not something we can go without, especially during times like this.

Around our home, with 4 little children and 2 adults, we go through A LOT of handsoap. Depending on the kind of soap you’re buying, that can get a little pricey. We generally opt for all natural products in our home and that means we often have to pay a little bit more for certain products. Handsoap is one of those items.

The good news is that buying the ingredients to make a natural & effective handsoap here at home works out to be much less expensive. I also typically always have the ingredients around the house as long as I keep myself well stocked so I don’t ever have to worry about running out of soap and having to run to multiple stores to find handsoap.

So, let’s get started on making some natural & effective handsoap!

Here’s what you’ll need:

Soap dispenser bottles

A couple of years ago I switched to these foaming handsoap bottles because it seems like the kids don’t waste quite as much of it this way.

I have both glass and plastic bottles currently. I prefer glass but I also use the plastic ones for the bath soap I make for my kids. I purchased these from Amazon and so far they’ve worked quite well.

Pure Liquid Castile Soap

I’ve used Dr. Bronners Baby Unscented for many years. I usually purchase the big bottle because I use it for handsoap, bath soap and dish soap as well.

Essential Oils

You could leave this ingredient out if you don’t have any but honestly, I think it’s 100% worth it to invest in at least a few quality essential oils for your home.

I’ve tried many different brands over the years. For the last few years, I’ve used Young Living oils because I trust their quality. I don’t buy separate oils for my household products and personal products so it’s important that our oils are safe for us to use on our bodies as well as internally, not just for our cleaning products. I can trust Young Living to be safe and effective for our family so after researching them myself, that’s my number one choice. 

I use Essential oils in my handsoap to help kill bacteria and viruses (they smell so good too). Thieves oil and Citrus blend works extremely well for handsoap, dishsoap and cleaning products. You can look into that some more here:

https://www.youngliving.com/en_US/products/thieves-essential-oil-blend

https://www.youngliving.com/en_US/products/citrus-fresh-essential-oil-blend

*Be sure to do your own research on oils. If you’re interested, you can check out Young Living’s seed to seal quality commitment and its three pillars- sourcing, science and standards right on their website! They’ve been doing this for 25 years and have made it their mission to be the best available on the market. You can also ask me as well! 

The only other ingredient you’ll need is water. 

So, now that you know what you’ll need, let’s get started. This is literally so easy to make that you’ll have handsoap for all the bathrooms in minutes!

Step one: 

Fill the bottle about 1/4 of the way with castile soap. It doesn’t have to be exactly 1/4 but try to get it to about 1 part soap 3 parts water.

castile

Step 2:

Add about 7 drops of Thieves oil and 3-5 drops of Citrus oil.

soap1

Step 3: 

Fill the rest of the dispenser with water. Just make sure you leave some space at the top to add in the pump.

soap4

That’s it! It’s so easy and believe me, it works! It smells pleasant and saves you money! Give this soap a try…you won’t regret it!

Hang in there guys! Hopefully this Covid19 nightmare will be over soon! Make sure you stay home as much as possible and wash those hands!

DIY Laundry Soap

It’s been a chaotic and uncertain time for many of us these past couple of weeks so this space has been quiet a bit longer than I’d intended. Fortunately we are all well in my home and I pray those of you reading are healthy too!

As promised, I wanted to share a simple tutorial on making inexpensive (and easy) laundry soap. The more things you can make from home (using simple ingredients that we typically keep at home in bulk anyway) the less trips to the store you have to make. At the moment that’s a wonderful thing!

Even when life returns to normal, skills like making your own laundry soap help make life a little slower and more simple. If you’re like us and living on a small budget, DIY laundry soap along with other simple laundry ingredients and accessories, will save you quite a bit of money. 

laundry soap4

Here’s some info on the basic items that I buy regularly and try to keep on hand at all times:

A large jar like this one is what I use to store my powder laundry soap. You can find these at Walmart for roughly $9. I believe this one is their Anchor Hocking line. I can’t remember where I got the scooper from but I am pretty sure I didn’t buy it. It came from some other packaged item.

laundry soap

Next, you’ll need washing soda, borax, baking soda and Fels Naptha bar soap. I usually buy the large box or bag of baking soda but during my last grocery run they didn’t have any so I had to settle for the little boxes. I usually keep multiple boxes and bars at the house so I have extra and can make it without having to run to the store for ingredients. With 4 kids I have a lot of laundry and make a lot of this stuff!

I also bought a grater from the dollar store that stays with my laundry supplies specifically for making laundry soap.

The washing soda is approximately $4 per box. The baking soda is $4 for a 5lb bag. The borax is $4.50 and the Fels Naptha bar is less than $1.

cd2

In addition to the ingredients listed above, I have purchased the dryer balls in place of dryer sheets. Mine are old and need to be replaced so I’ve been looking around on Amazon for a replacement. These are what I’m going to be ordering soon:

SnugPad Wool Dryer Balls XL Size 6 Pack, Natural Fabric Softener 100% Organic Premium New Zealand Wool, Chemical Free and Reduces Wrinkles, 1000+ Loads

They go for about $9 on Amazon.

cd1

Lastly, I use white vinegar in place of fabric softner as needed. Walmart has it for less than $3 for one gallon. I store some in a small glass jar with a lid to make it easier to use.

Ok, so now you know approximately what it’ll cost to get you started and what ingredients you’ll need. Now lets talk about what to do to put it all together. It’s going to take you about 10 minutes at most to make it. It really is that simple.

You’re going to fill about 1/4 of the jar for each of the powders (baking soda, borax and washing soda). Leave about 1/4 of the jar for the bar soap.

laundry soap2

Next, you need to shred the soap into fine shavings and add it in. Then mix it all together with a spoon.

laundry soap3

Now you have about a gallon of laundry soap. Depending on how much laundry you do, this will last you quite a while. I think for us it usually lasts about 2 weeks. I typically will use about a scoop to 1 1/2 scoops depending on the size of the load. The soap works very well to remove odor and stains. In fact, for stubborn stains, keep a whole bar of Fels Naptha on hand and soak the item in cold water and rub with the bar soap. Be sure to always use cold water with stains.

Side note: if you want the laundry to have a stronger scent when you pull it out of the dryer, you can add some drops of your favorite essential oils to the dryer balls. I really enjoy using Young Livings Lavender or Geranium oils for my laundry.

Another laundry tip: if you have problems with mildew odors in towels, use hot water to wash them and add a few drops of Melaluca oil. It’s an antifungal and significantly decreases that problem.

You can use this laundry soap on all of your laundry, delicates, towels, baby clothes and cloth diapers!

You can check out my post on what cloth diapers we use here:

https://oursimplefamilyliving.wordpress.com/2020/02/26/cloth-diapering-essentials-favorites/

You can also check out how I care for our cloth diapers here:

https://oursimplefamilyliving.wordpress.com/2020/03/08/caring-for-cloth-diapers/

I hope you find this information helpful and that it inspires you to live more simply.

Feel free to share any great laundry tips and tricks in the comments! 🙂

Stay healthy friends!

Homemade Butter & Buttermilk

I’ve been baking bread for a long time. The store bought stuff just doesn’t compare. It’s worth the extra time and work every time! So what do you do with a fresh loaf of homemade bread?! You pair it up with some fresh homemade butter, of course! It sounds crazy…making your own butter, I know. A couple of years ago I was a little nervous to try it. If you have a mixer, it’s basically making overwhipped whipped cream! Within a few minutes you can turn a 32 oz bottle of heavy cream into about two sticks of butter. Just make sure to stay by the mixer because it goes pretty quickly and if the mixer is turned up too high it’ll make a terrible mess. I recently stepped away for a “second” to change a diaper and returned to buttermilk splashed all over the mixer, the counter, the floor. It wasn’t pretty.

Here’s what you need:

32 oz bottle of heavy cream

bottle or jar to store the buttermilk in (I reused a bottle from juice)

mixer with whisk attachment

butter dish and parchment to store the finished butter in (I put one in the dish and store the other in parchment in the fridge)

butter 1

Step One: pour the whole bottle of cream into the mixer and set to about medium speed.

butter 2

You can see the bubbles starting to form.

butter 3

Getting close to “soft peak” whipped cream.

butter 4

butter 5

Step two: Here we’re at about overwhipped whipped cream stage. At this point I would turn the mixer down just a little.

butter 6

butter 8

It’s getting thicker now. Not much longer before it starts to separate.

butter 9

butter 10

Step three: it’s separating now and most of the solids will stick to the whisk attachment.

butter 12

Check out that buttermilk! It’s great for biscuits, pancakes, homemade ranch and more!!!

butter 13

Step four: take the butter out of the mixing bowl and work out the rest of the buttermilk using either your hands or a wooden spoon/spatula.

butter 15

Step five: shape the butter the way you like it. Sometimes I leave it like this but most of the time I separate this into two sticks of butter.

butter 16

Step six: pour buttermilk into your jar or bottle. I generally prefer glass over plastic.

butter 17

There you go! Six easy steps to fresh butter and buttermilk!

butter 18

Now make yourself some English muffins and enjoy! 🙂

english muffin